Building a Personal Archive of Film Photographs
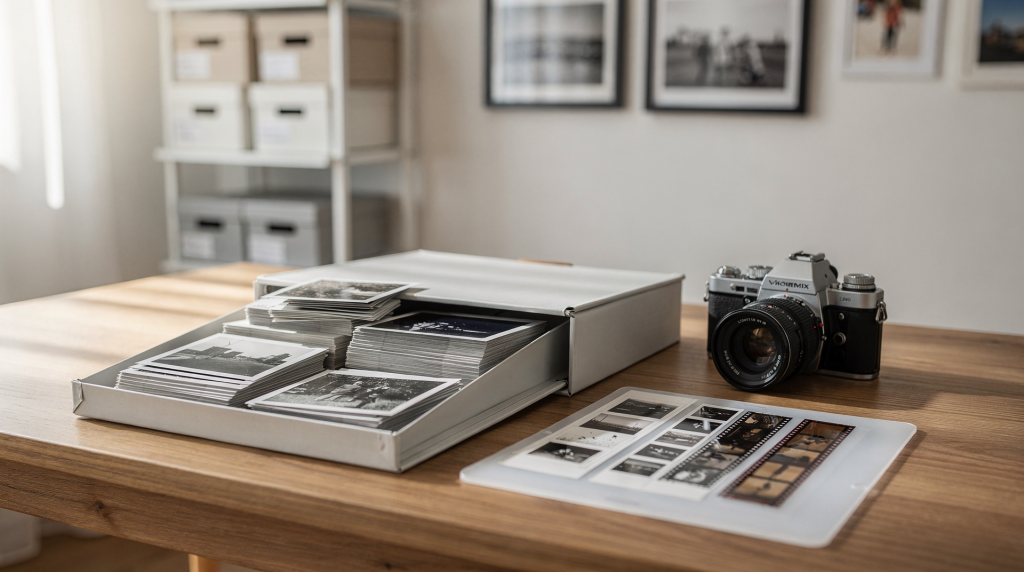
A strong personal archive isn’t a shoebox of sleeved negatives on a shelf. It’s a working system that guards your images, lets you retrieve a single frame in seconds, and — most importantly — preserves the context that turns a photograph into a document with memory. For anyone photographing architecture and interiors on film, that context is everything: an archive built well becomes a visual record of how light shifts across a room, how materials age, and how a place changes across seasons and commissions.
Why a film archive matters
A film archive does two quiet, essential jobs at once: preservation and retrieval. Preservation means keeping negatives, contact sheets, and scans safe from heat, humidity, dust, and the wear of handling. Retrieval means being able to find the right frame six months or six years later without squinting at a lightbox and guessing.
When you shoot assignments — especially architecture — the archive becomes proof of process, a reference library, and a direct path to future prints, publications, and editorial uses. I learned this the hard way early on. A townhouse I documented on medium format across three different seasons started as a personal project, but when a publication asked for a specific detail of staircase joinery, only a disciplined naming system let me pull the exact roll and frame notes from two years prior. If you photograph buildings, you’re often documenting something that won’t look the same in a few months. The archive keeps the evidence.
What a personal archive should include
In practice, a usable archive lives in three layers:
- Physical negatives and slides stored in archival-quality sleeves and boxes. This is the irreplaceable original.
- Digital scans with consistent file names and at least one backup copy kept offsite or in the cloud.
- Metadata or shoot notes that link each frame to the assignment, address, date, film stock, camera, and any quirks of the session.
If one layer fails, the others keep the image accessible. If all three are tied together with a clear system, the archive becomes something you can actually search and grow without dread — a living tool, not a storage problem.
Build the system before the pile grows
The most common regret I hear — and the one I’ve felt — is waiting until shelves are full. Sorting fifty unlabeled rolls months later is exponentially harder than labeling them while the scent of fixer still lingers and your memory of the shoot is fresh. A simple system applied consistently will always outperform a grand plan you abandon after a week.
Choose your top-level structure
Pick one primary logic and stick with it. Common routes:
- By year
- By project
- By camera
- By film stock
- By subject (architecture, portraiture, landscape, editorial)
For most working photographers, the cleanest approach is chronological: year first, then project or roll number inside that year. I use this because it mirrors how I think about time and light — I remember the season of a shoot, and that immediately narrows the search. When I shot a late-Victorian porch on Ektachrome in November, I didn’t file it under “porches”; I filed it under 2024, then the assignment code. That hierarchical order still makes individual shoots findable in seconds.
Assign every roll a unique identifier
Every roll needs a unique code that appears on the negative sleeve, the scan folder, and your notebook. It doesn’t have to be poetic — it has to be consistent. A simple format:
- 2026-ARCH-01
- 2026-INT-02
- 2026-THS-03
The exact shape of the code matters less than the habit. Once a roll has a code, you can cross-reference the physical negative, the scan, and the contact sheet without ever relying on memory. For architecture work, I often slip a location abbreviation into the code — it anchors the roll to a specific building or street, which pays off when a client revisits the same property years later.
How to store negatives properly
Physical storage is the foundation. An archival negative can outlast us if the materials are right. I’ve seen disheartening examples: negatives stored in damp basements, curled in cheap paper envelopes, or taped directly into albums. The fix isn’t expensive — it’s methodical.
Best practices for film storage
- Use archival, acid-free sleeves designed for photographic materials. Polyethylene or polyester (Mylar) are safe choices; ordinary office page protectors are not.
- Keep negatives in a cool, dry location. High humidity invites mold and emulsion damage.
- Store sleeves vertically in boxes or dedicated binders — this reduces bending, warping, and the slow creep of friction.
- Group similar formats together: 35mm with 35mm, 120 with 120. Mixed sizes lead to awkward pressure points and scratches.
- Never write on the emulsion side of film. A soft pencil on the rebate is sometimes done, but I avoid it entirely — labels belong on sleeves, not on the film base.
- Label the sleeve, not the film itself. Use a fine-tip archival pen or a printed sticker with the roll code.
Temperature and humidity
Cold storage slows chemical decay, and for long-term holding of historically valuable negatives, it’s ideal. But the real enemy is instability: sudden swings in temperature and humidity cause more damage than a steady, slightly warm room. If you use refrigerated storage, the film must be sealed against condensation and allowed to acclimate slowly when removed. For most personal archives, a cool, dry interior closet with a stable climate works beautifully. I keep my working negatives in acid-free boxes inside a metal cabinet away from radiators and exterior walls, and I’ve never had issues with base degradation.
What not to do
- Never store negatives in random paper envelopes, office file folders, or wooden drawers — acids and volatile compounds from non-archival materials migrate into the emulsion.
- Don’t tape negatives directly into albums or scrapbooks; adhesive can permanently damage the film base.
- Never keep an archive in an attic, basement, or garage where temperature and humidity swing wildly.
- Avoid stacking sleeves so tightly that they press or curl the film. Gentle storage extends life.
- Stay away from materials that haven’t been tested for photographic-activity safety. If you’re unsure, look for supplies that passed the Photographic Activity Test (PAT).
Digitize with a purpose, not just for backup
Scanning isn’t merely an insurance policy. It gives you a working copy that preserves the frame even if a negative gets scratched, molds, or is lost, and it makes your archive searchable. For most film photographers, the scan is what we browse first, while the negative remains the master original — the “hard copy” that holds all the grain structure and tonal information.
With architecture, scanning also reveals details that a loupe on a light table might hide: how the texture of aged plaster interacts with the grain structure of a particular film stock, or how window light bleeds across a scene. I scan to understand the negative better, not just to have a file.
Minimum scanning workflow
- Clean the negative carefully with an anti-static brush or compressed air before scanning. Dust spots in sky areas of an architectural exterior are unforgiving.
- Scan at a resolution appropriate to your end use. For medium format negatives destined for print or editorial, I generally scan at 3200–4000 dpi.
- Save a master file (TIFF) and a smaller working file (JPEG or TIFF) for contact-sheet-style browsing.
- Keep the original frame sequence intact; it tells a story of how you moved through a space.
- Match the scan filename to the sleeve code and roll number. No exceptions.
Recommended file naming structure
A clear naming system that has saved me hours looks like this:
2026-ARCH-01_frame05_LeedsTownhouse_120.tif
This single name tells you the year, project, frame, location, and format — all without opening the file. In architecture work, where a single room might be photographed on 35mm and 120 across separate visits, that instant recognition is invaluable. It also prevents the mess of files named “img_8927 copy 3.”
A practical workflow for every shoot
An archive works when the routine is repeated without shortcuts. After every roll — developed and in hand — I follow the same steps. This rhythm has turned a chore into a nearly automatic part of my process, much like loading a reel in a changing bag.
Step-by-step workflow
- Unload the film from the developing reel and immediately place it in a labeled archival sleeve. The emulsion is vulnerable right after processing; handle by edges.
- On the sleeve, write the roll ID, date, camera, film stock, and subject. I use a fine-point pigment marker that doesn’t bleed.
- Scan the roll or, if time is short, at minimum make contact sheets. (I often make quick flatbed scans for the record.)
- Rename digital files to match the roll ID right after scanning — not a week later when you’ve forgotten which folder is which.
- Save one master copy on my working drive, then immediately make at least one backup copy to a separate external drive.
- File the negatives in a box in chronological order.
- Add a short shoot note while the session is still vivid. I keep a simple notebook, but a plain text file does the job too.
The last step is the one people skip, but for architecture work, it’s gold. A sentence about how cloudy soft light rendered the limestone stairs, or how I had to push HP5+ one stop because the interior was darker than expected, turns a pile of frames into an editorial resource.
What to record in your notes
For architectural and interior photography, the best notes are brief, specific, and written in the language of light and materials. They don’t need to be essays — a few well-chosen lines at the end of a shoot can save hours of reconstruction later, especially when comparing film stock behavior across spaces.
Useful metadata fields
- Date of shoot
- Property name or address
- Client or assignment title (if any)
- Camera and lens used
- Film stock (and ISO rating if I deviated from box speed)
- Development process (developer, dilution, time, temperature)
- Lighting conditions: time of day, weather, dominant light direction
- Any exposure quirks or challenges (for example, bright windows next to dark woodwork)
- Access constraints (room not available, scaffolding present)
- Final intended use: editorial, portfolio, client delivery, documentation
These fields let me cross-reference results across different emulsions. I can pull up every frame shot on Portra 400 in north-facing rooms with overcast light and understand why that combination works so well for capturing the subtle color of painted plaster, while Ektachrome in the same conditions might go too cool. The notes become my own private lab journal.
How to archive architecture and interior work specifically
Spaces change slower than people, but they do change. Materials weather, paint yellows, furniture gets rearranged, and the angle of light through a south-facing window is completely different in December than in June. A building-focused archive must capture these shifts. When I first photographed a Federal-era hallway on a rainy afternoon with Tri-X, the grain clung beautifully to the worn balustrade; a year later in direct sun, the same staircase felt theatrical and sharp. Both are true, but only if the notes attach the right context.
What to preserve for building-focused photography
- Overall views that describe the spatial structure of a room — where walls meet, how the floor plan reads.
- Detail shots of textures: plaster cracks, wood grain, joinery, peeling paint. On medium format, these subtle surfaces gain a tactile presence that digital sharpness sometimes flattens.
- Frames that show light direction and shadow behavior over time. I often leave a small notebook sketch of sun paths.
- Alternate exposures from the same viewpoint — especially when bracketing to handle high-contrast interiors, a common challenge in available-light architecture work.
- Notes on reflective surfaces (mirrors, polished floors) and mixed-lighting situations where tungsten and daylight overlapped.
Why context matters
A hallway photographed on an overcast morning at box speed on FP4+ tells a different story from the same hallway shot at dusk on pushed HP5+. Without notes, those differences blur into guesswork. With notes, the archive becomes a research tool. I can reconstruct why a particular frame resonated — perhaps because the soft light flattened contrast just enough to let the ceiling molding read clearly, or because the push-processed grain added a grittiness that suited an abandoned factory. Context doesn’t just describe the image; it explains the intention behind it.
Common mistakes that weaken an archive
Most failing archives don’t suffer from bad images — they suffer from vague organization. I’ve learned this by cleaning up my own early messes, where a stack of gorgeous negatives was nearly useless because I couldn’t tell which roll held the wide-angle shot of the library or the close-up of the cast-iron radiator.
Typical mistakes
- Inconsistent file names that mix dates, titles, and random numbers
- Mixing scanned and unscanned rolls without a tracking log
- Unlabeled negative sleeves — a crime against your future self
- Backing up files only to one location, trusting a single external drive
- Forgetting to note film stock or camera, making emulsion comparisons impossible
- Sorting by memory (“the roll from that rainy day”) instead of a code
- Keeping everything in a single folder with no hierarchy, turning a month’s work into digital quicksand
How to avoid them
The cure is unglamorous but unfailing: label everything, use one naming format without exceptions, and back up on a fixed schedule. I run a thirty-minute maintenance session on the first Monday of each month. It’s tedious for about five minutes, then meditative. A simple archive that gets updated regularly will serve you far better than an elaborate structure you stop using after two months. Film already asks for a slower rhythm — let the archive reflect that.
Backup strategy for digital files
Your digital archive should live in at least two physically separate places. One copy is your working drive; another is a separate backup. A third copy, kept offsite or in the cloud, guards against fire, theft, or drive failure. When I think about the negatives of that first townhouse project, I have the physical film, a working scan drive, a mirrored external drive at home, and a cloud backup. Redundancy isn’t paranoia — it’s just good practice.
Basic backup checklist
- Master scan on the main working drive
- Second copy on a dedicated external drive that lives disconnected when not in use
- Third copy offsite (cloud service or an external drive stored in another building)
- Periodic check of backup integrity — open a random TIFF and compare it to the master
- Never rename folders randomly after backup, because incremental sync relies on stable paths
A simple archival structure that scales
If you want a system that can grow from a few rolls a year into a magazine-scale editorial library, use a hierarchical skeleton. I’ve used this structure for nearly a decade, and it expands gracefully whether I shoot ten rolls or a hundred.
| Level | Example | Purpose |
|---|---|---|
| Year | 2026 | Broad chronological sorting |
| Project | 2026-ARCH-01 | Assignment or shoot grouping |
| Roll | Roll 03 | Individual roll tracking |
| Format | 35mm / 120 | Separation by film type |
| File | frame05.tif | Scan-level identification |
This structure works for personal explorations, client assignments, and pulling frames for publication. Because it separates format, I can later cluster all 120 frames of a project together, which suits the way I often present architectural work — medium format for space-defining wide shots, 35mm for detail textures and rhythm.
Monthly archive maintenance checklist
A short monthly review keeps entropy at bay. I do this with a cup of coffee and the door closed, and it rarely takes longer than twenty minutes. The reward is an archive that feels clean, not claustrophobic.
- File any undeveloped or unsleeved film that’s been sitting in “pending” limbo
- Check that sleeves and boxes are still dry, dust-free, and properly stored
- Confirm that scan folder names map correctly to physical roll sleeves
- Verify backup copies — open a couple of random files on the backup drive
- Spot-check and rename any stray files that diverged from the naming format
- Add brief notes to recent shoots that feel incomplete
- Delete duplicate files that accumulated during edits and no longer serve a purpose
Regular maintenance prevents the archival debt that becomes overwhelming later. And there’s a quiet pleasure in handling the sleeves, seeing a timeline of your seeing laid out in silver.
When to print
Digital files are convenient, but a pigment print or even a darkroom work print remains one of the most stable ways to view a favorite frame without hardware, software, or compatible ports. For the strongest images in your film archive — the ones that truly capture a space — make a print or a proof print and store it with the notes. A physical print also serves as a tactile reference when you’re selecting images for a portfolio, book dummy, or exhibition wall. In architectural photography, where surface texture and tonal separation matter, holding a print confirms whether the grain structure translates in a way that a backlit monitor can’t fully reveal.
FAQ
How many copies of a film photo should I keep?
Keep the negative, the master scan, and at least one backup copy. For images that hold high editorial or sentimental value, a fine print is an excellent extra safeguard — it’s a physical artifact that doesn’t need a computer to be seen.
Should I archive by date or by project?
Use both if your system allows. Date gives chronological order, while project gives narrative context. A year-plus-project hierarchy (e.g., 2025 / ARCH-02) usually offers the best practical balance for a working film photographer.
What is the best file format for scans?
TIFF remains the standard for master scans because it’s non-lossy and preserves the full tonal range. JPEGs are fine for contact sheets, social previews, and quick sharing, but they shouldn’t replace a master. For critical architectural work, I archive as 16-bit TIFF in Adobe RGB or ProPhoto RGB to retain shadow detail in high-contrast interiors.
Do I need to scan every frame?
If the roll matters to your archive — yes. At minimum, scan the keepers and any frame that has documentary or reference value. For architecture, I’ve often found that a frame I dismissed because of a slight exposure misjudgment later became a valuable record of construction details or material condition. In archival work, more coverage almost always proves wiser than less.
Is cold storage necessary for a personal archive?
Not always, but cool and stable conditions significantly extend the life of negatives, especially for long-term holding and for acetate-based films susceptible to vinegar syndrome. If you can’t provide cold storage, focus on low humidity, stable temperature, and archival-quality enclosures. A closet in a living space, away from exterior walls and heat sources, often works well enough for decades.
Final thoughts
A personal archive of film photographs needs to do three things well: protect the physical negative, preserve a high-quality scan, and keep the story — the light, the place, the season, the choices — attached to both. When the system is simple, built around habits you’ll actually repeat, it stops feeling like administrative overhead and becomes part of how you shape your work. For a film photographer, that archive is more than storage. It’s the memory of how you saw the world, one carefully labeled frame at a time — a living catalogue of grain, texture, and the quiet accumulation of spaces you chose to keep.