A Day in the Life of a Film Photographer
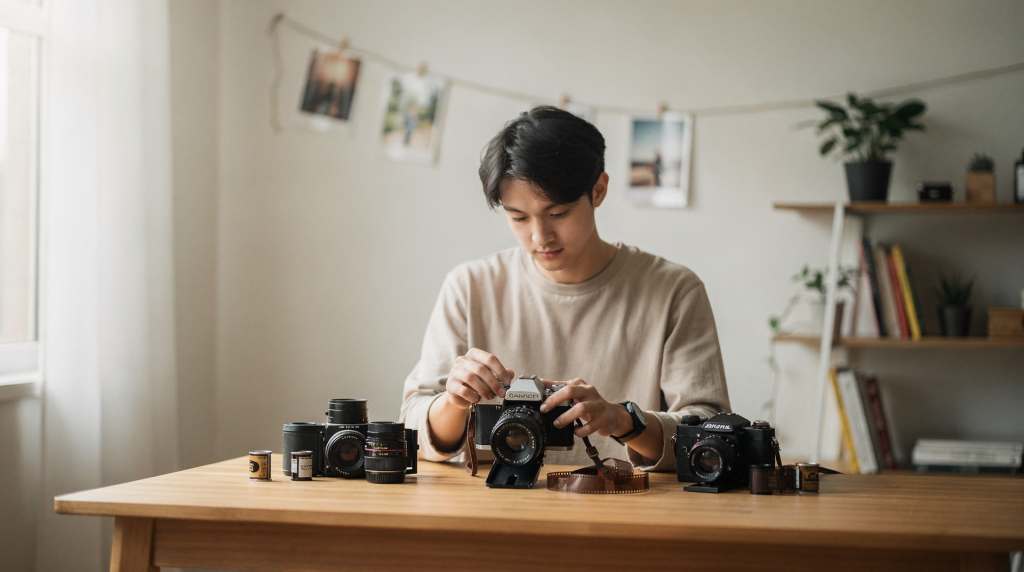
A day in the life of a film photographer is rarely about volume. It is about attention: to light, to timing, to the way a room feels before a shutter is ever pressed. In architectural and interior work, that attention becomes even more important because the photograph has to describe space honestly while still giving it atmosphere and rhythm. When I load a roll of Portra 400 into my Mamiya RZ67, I’m not thinking about how many frames I’ll take—I’m thinking about how the afternoon light is carving shadows across a century-old staircase, and whether the film can hold that nuance better than my eyes ever could.
What the day actually looks like
The workday starts long before the first frame. Film photography rewards preparation because every choice on set affects what comes back from the lab—and unlike digital, there’s no chimping at the back of the camera to reassure you. For architectural assignments, that means reading the space, understanding the light, and planning a sequence that respects both the building and the film stock being used. I’ve learned the hard way that a poorly chosen ISO or an unchecked meter reading can haunt you until the negatives come back from the lab.
A typical day usually moves through these stages:
- Pre-shoot planning
- Arrival and light check
- Establishing compositions
- Metering and exposure decisions
- Shooting the main sequence
- Notes, labels, and film handling
- Review after development
This is not a fast, reactive workflow. It is methodical by design—and that’s the point. Working with a Mamiya RZ or a Pentax 67 forces a rhythm that digital bodies rarely impose. Every frame costs money, every advance of the lever commits you, and that economy of intention seeps into how you read a building.
1. Before the shoot: the real work starts earlier
Most of the important decisions happen before the camera comes out of the bag. For architectural photography, the goal is to understand the space well enough that the shoot feels calm rather than improvised. I’ll often visit a property the day before if it’s local—not to shoot, just to walk through and watch how light moves from morning to late afternoon. A room can feel completely different at 9 a.m. versus 3 p.m., and knowing that shift helps me choose which film stock to load first.
What to confirm in advance
- The purpose of the images: editorial, portfolio, documentation, or client delivery
- The building’s orientation and window light
- Which rooms matter most
- Access restrictions and shooting windows
- Whether artificial lights will stay on or be turned off
- The likely contrast level between interior and windows
- The film stock and format to bring
If a room has strong windows and darker corners, expect to bracket more aggressively. Film can hold a lot—I’ve pulled detail from shadows that looked hopelessly underexposed—but bright exterior light and dim interiors can still exceed what one exposure can comfortably describe. I typically pre-load two backs for the RZ: one with something forgiving like Portra 400, another with Ektar 100 if I know I’ll need that crisp saturation for painted woodwork or tiled floors.
A simple prep checklist
- Pack enough rolls for the full sequence—and then add two more
- Load fresh batteries
- Bring a tripod and cable release
- Carry a spot meter or incident meter
- Clean lenses and check caps
- Confirm tripod height and stability
- Label film before leaving
- Pack notes for frame numbers and scene descriptions
2. Arrival: reading the space before shooting it
A good film photographer does not rush to “find the shot.” First comes observation. Walk through the property quietly. Watch where the light lands, where it bounces, and where it breaks. I sometimes spend fifteen minutes before I even uncap a lens, just standing in doorways and letting the space tell me where its strongest feature lives. It’s often not the obvious thing—not the grand fireplace but the way light wraps around a plaster arch, softening the edges.
For interiors, the most useful light is often indirect daylight. North-facing rooms tend to be steadier, with a cool consistency that’s kind to skin tones and wood. South-facing rooms can be more dramatic, throwing hard shafts across floorboards, but they may also shift quickly as the sun moves. Morning and late afternoon often give better shape because side light reveals texture and makes materials feel dimensional. You can see every brushstroke in the paint, every grain in the wood, every hairline crack in the plaster.
Questions to ask on arrival
- Where is the strongest natural light?
- Which walls carry the room’s color cast?
- Are there reflective surfaces causing flare?
- Does the room feel better with direct sun or softened light?
- Which angle best shows the proportions of the space?
- What will the camera see that the eye might ignore?
This is especially important in historic properties, where plaster, wood, stone, and worn finishes all react differently to light. Old whitewash can glow warmly, while aged varnish might create hotspots you need to meter around. I’ve found that a honey-colored pine floor can throw a golden cast into the entire lower half of a room, subtly warming the walls above it.
3. Choosing the first frames
The first images are usually establishing shots. They explain the room, the building, or the facade before the details begin. I think of them as the opening paragraph of an essay: they set the scene, establish the tone, and give context that makes the later details meaningful.
A sensible sequence is:
- Wide view of the exterior or main room
- Secondary angle that shows circulation or depth
- Detail frames of materials, fixtures, or joins
- Transitional images that connect rooms or zones
- Any special features that define the property
This sequence matters because a good set of film images should read like a narrative, not a random collection of attractive frames. When I lay out contact sheets later, I want someone to feel like they’ve walked through the house in a coherent path, not teleported from corner to corner.
What makes a strong establishing frame
- Straight verticals
- Clear foreground-to-background depth
- Balanced negative space
- One obvious subject
- Light that guides the eye without flattening the room
4. Metering: where film photographers earn their keep
Metering is one of the most important habits in film work. On digital, it is easy to fix exposure mistakes with a slider. On film, each frame matters—you’re burning roughly a dollar every time you press the shutter on medium format. For architectural interiors, many photographers prefer an incident meter or spot meter on a neutral wall. That gives a more controlled reading than trusting the camera alone, especially in spaces where windows and dark corners exist in the same frame. The aim is not to expose for the brightest window or the darkest corner; it is to place the room where it feels natural, where the light lands like it would in memory.
Practical exposure approach
| Bright windows with a darker interior | Bracket several exposures | Film latitude is useful, but contrast can still be extreme |
| Even overcast daylight | Meter normally and refine composition | Soft light usually gives the cleanest tonal balance |
| Mixed daylight and tungsten | Decide whether to correct color or embrace the mix | Mixed sources can complicate both color and mood |
| Textured surfaces like plaster or wood | Meter carefully and avoid clipping highlights | Texture disappears when highlights are too hot |
For interiors, a tripod is usually non-negotiable. Long shutter speeds—sometimes a full second or more—are normal when you’re stopped down to f/11 or f/16, and a small aperture helps keep the entire room sharp. That combination is slow, but it creates the kind of clarity architectural work needs. I feel the absence of a tripod immediately: handholding medium format in a dim parlor is a gamble I rarely win.
5. Working with natural light instead of fighting it
Film photographers often do better when they collaborate with the available light rather than overpowering it. Natural light gives a room honesty. It also creates a sense of time—the direction of shadows tells you whether it’s morning or late afternoon—which is part of what makes analog photography feel alive. I’ve never understood the impulse to blast every surface with neutral fill light until the room looks like an operating theater. The shadows are half the story.
What to look for in natural light
- Side light that reveals texture
- Soft daylight that avoids harsh contrast
- Window light that shapes the room without dominating it
- Reflections that support the composition rather than distract from it
A common mistake is shooting too late in the day when the room has become visually flat, or too early when the sun creates unmanageable hotspots. The best time often depends on the room itself, not just the clock. I’ve had rooms that looked lifeless at noon come alive around 4 p.m., the low sun raking across a textured wallpaper in a way that felt almost cinematic.
Common lighting problems and fixes
- Problem: Harsh sun patches on floors
Fix: Wait for softer light or shoot from a different angle - Problem: Windows too bright compared with the room
Fix: Bracket exposures and simplify the composition - Problem: Color casts from mixed bulbs
Fix: Decide whether to correct them or let them become part of the scene - Problem: Flat, lifeless light
Fix: Come back at a different time of day
6. Why film changes the way a room is seen
Film is not just a recording medium. It translates material. Grain, tonal rolloff, and color response all affect how a space is interpreted. Digital sensors capture data; film captures an impression that feels closer to how we actually experience a room—soft around the edges, biased toward warmth, with a forgiving rolloff in the highlights that keeps windows from turning into white voids.
That matters in architecture because a building is made of surfaces, and surfaces are what film loves to describe: worn wood, matte plaster, polished brass, faded paint, stone with age in it. Film can soften a scene just enough to make those materials feel tactile rather than clinical. When I shoot a worn staircase on a 6×7 negative, I can almost feel the smooth dip in the treads where generations of feet have passed.
When film is especially useful
- Historic interiors
- Houses with layered textures
- Properties where mood matters as much as documentation
- Editorial or portfolio work
- Projects where the story of the space matters
When film can be limiting
- Fast commercial turnaround
- Highly technical documentation needs
- Spaces with uncontrolled lighting and no time for careful setup
- Assignments that require very exact repeatability
7. Managing the pace on set
A day on location often feels slow to outsiders, but the pace is intentional. Each frame requires thought: level the tripod, check the composition, meter again, confirm the exposure, and only then make the shot. I’ve had clients hover behind me, puzzled by the stillness, until I explain that the alternative is ten blurry digital frames and zero good ones on film.
A simple on-site rhythm
- Set the tripod
- Level the camera
- Check verticals and horizontals
- Meter the scene
- Decide on bracket range
- Make the exposure
- Record the frame notes
- Move to the next position
That discipline prevents careless mistakes and saves rolls from being wasted on avoidable errors. It also keeps your head clear: when you know you’re following a sequence, you’re less likely to forget a crucial corner or skip a detail because the light changed suddenly.
8. The role of notes and frame tracking
Film work gets much easier when every exposure is documented. Without notes, it becomes difficult to connect a negative to a room, a light condition, or a particular lens choice. I use a small leather-bound notebook where each page corresponds to a roll; later, when I get scans back, I can cross-reference the frame with the exact moment I stood in a sun-drenched corridor, trying to balance a skylight against deep oak paneling.
Notes worth recording
- Roll number
- Frame number
- Location or room name
- Film stock
- Lens used
- Meter reading
- Bracket sequence
- Any lighting issue or special setup
This is especially useful for architectural case studies, where the story of how the image was made is as important as the image itself.
9. Common mistakes film photographers make in interiors
Even experienced photographers can slip into habits that weaken the final result. I’ve made most of these myself at one point or another, and they usually show up when I’m tired, rushed, or too comfortable with a familiar room.
Typical mistakes
- Shooting too quickly without checking verticals
- Underestimating contrast between windows and room interiors
- Forgetting to note frame numbers
- Using a wide composition when the room needs a more intentional crop
- Ignoring color casts from practical lights
- Choosing a film stock that is too slow for the available light
- Overlooking how much the camera position changes the feel of the architecture
How to avoid them
- Slow down before each exposure
- Recheck the room after every major lighting change
- Match film stock to the light level and desired tonality
- Treat the room as a subject, not a backdrop
- Review the sequence in your head before pressing the shutter
10. End of day: what happens after the last frame
The work is not over when the camera is packed away. Film photography continues in the lab, where development reveals whether the day’s decisions held together. I always feel a quiet anticipation when I hand my rolls over to the lab—it’s the gap between intention and result, and it never quite loses its edge.
After the shoot, it helps to:
- Confirm which rolls were exposed
- Store film safely and consistently
- Keep notes with the rolls
- Log any unusual lighting or exposure concerns
- Review contact sheets or scans with the original scene in mind
This is where the day becomes a story. The negatives show not just what the space looked like, but how it was experienced.
Field notes: the ideal mindset for a film photographer
The best film photographers are usually calm, prepared, and observant. They do not chase constant variety. They wait for the right light, the right angle, and the right moment when a space begins to express itself. I’ve sat in empty rooms for half an hour, just watching the shadows inch across the floor, waiting for the perfect intersection of light and architecture that tells me it’s time to fire the shutter.
That is why a day in the life of a film photographer feels less like production and more like translation. The job is not simply to capture a building. It is to interpret how the building holds light, age, texture, and memory.
Quick checklist for a film architecture shoot
- Confirm the purpose of the shoot
- Scout the light before setting up
- Bring a tripod and meter
- Choose film stock for the light and mood
- Start with wide establishing frames
- Bracket when contrast is high
- Keep verticals straight
- Record every frame
- Protect exposed rolls
- Review the results with notes in hand
FAQ
How many rolls does a film photographer usually bring to one shoot?
It depends on the size of the property. For a small apartment, three to four rolls of 120 might suffice. For a large historic house with multiple rooms, outbuildings, and varied light conditions, I’ll bring eight or ten—and rarely regret the extra stock when a door opens onto an unexpected courtyard or attic studio. Running out is far more painful than carrying too much.
What film stock is best for interiors?
A versatile medium-speed color negative film like Portra 400 or Fuji 400H is often the safest choice for interiors because it handles mixed lighting and moderate contrast well. For spaces with abundant natural light and fine detailing—frescoes, stucco, intricate joinery—I sometimes switch to Ektar 100 for its finer grain and higher saturation, but it’s less forgiving with exposure errors.
Why do architectural film photographers use tripods so often?
Because interiors often require small apertures of f/11 or f/16 and slower shutter speeds that can dip to half a second or more. Handholding in those conditions invites motion blur, especially on larger formats like 6×7 or 4×5. The tripod also keeps composition and focus stable while you move between bracketed exposures. Once you’ve leveled a shot to keep vertical lines parallel, the last thing you want is to redo it because you bumped the camera.
Is natural light always better than flash?
Not always, but natural light usually gives interiors a more believable and atmospheric look, especially in historic or design-focused spaces. Flash can freeze a room and strip away the gentle gradients that make a space feel inhabited. I use it sparingly, and only when the available light is so weak that it would force impractical shutter speeds or rob the scene of its character entirely.
What is the biggest difference between film and digital in architectural work?
Film encourages slower decisions and gives the space a softer, more interpretive tonal quality. Highlights roll off gradually instead of clipping abruptly, and grain adds a subtle texture that makes surfaces feel tangible. Digital is faster and more flexible for correction, but it often lacks that organic translation of material. Choosing between them isn’t about superiority—it’s about what best serves the story the building is asking you to tell.